Contact Us

Use the form on the right to contact us.

You can edit the text in this area, and change where the contact form on the right submits to, by entering edit mode using the modes on the bottom right. 

2915 19 St NE
Calgary, AB, T2E 7A2

18662506101

WonderFil Specialty Thread Blog

WonderFil brings you the latest news, events, upcoming thread lines and special tips and advice. Follow WonderFil Specialty Threads on our social media: Facebook, Instagram, Twitter, Pinterest, and Youtube.

Filtering by Tag: tutorial

Binding Quilts with Your Backing Fabric - No Binding Strips Needed!

Maura Kang

We want to show you a fabulous way of binding your quilts using just the backing fabric. It’s fast, easy, and still looks just as good as if you did it with binding strips. This is a wonderful way of simplifying your binding without sacrificing a professionally finished look!

We’re using this quilt block as an example of how to set up your own quilt to bind it with the backing fabric. This method will of course still work on a larger sized quilt, but we’ll just be demonstrating the technique on this block.

After your quilt has been quilted, you’ll have some leftover batting and backing fabric along the edges. If you plan on binding it with the backing fabric, you’ll need to leave an excess of about 2 or 3 inches of backing fabric.

2.png

Before you can begin binding, you’ll need to square up your quilt. Tuck your backing out of the way and trim the other layers with your rotary cutter. Be careful not to cut through any of your backing fabric. If you can’t get your backing out of the way enough that you won’t cut into it, you can also carefully trim your layers with a pair of scissors as long as you can get it all squared up evenly.

(Pinning the backing fabric out of the way)

(Pinning the backing fabric out of the way)

(Trimming the batting to square up the quilt)

(Trimming the batting to square up the quilt)

When your quilt is trimmed and squared up evenly, you can now trim your back fabric. You will need an inch of back fabric from the edge of your quilt, so take out your quilt ruler and trim it so that you have an even 1 inch of back fabric all the way around.

(Trimming the backing fabric to 1”/2.5cm

(Trimming the backing fabric to 1”/2.5cm

6.png

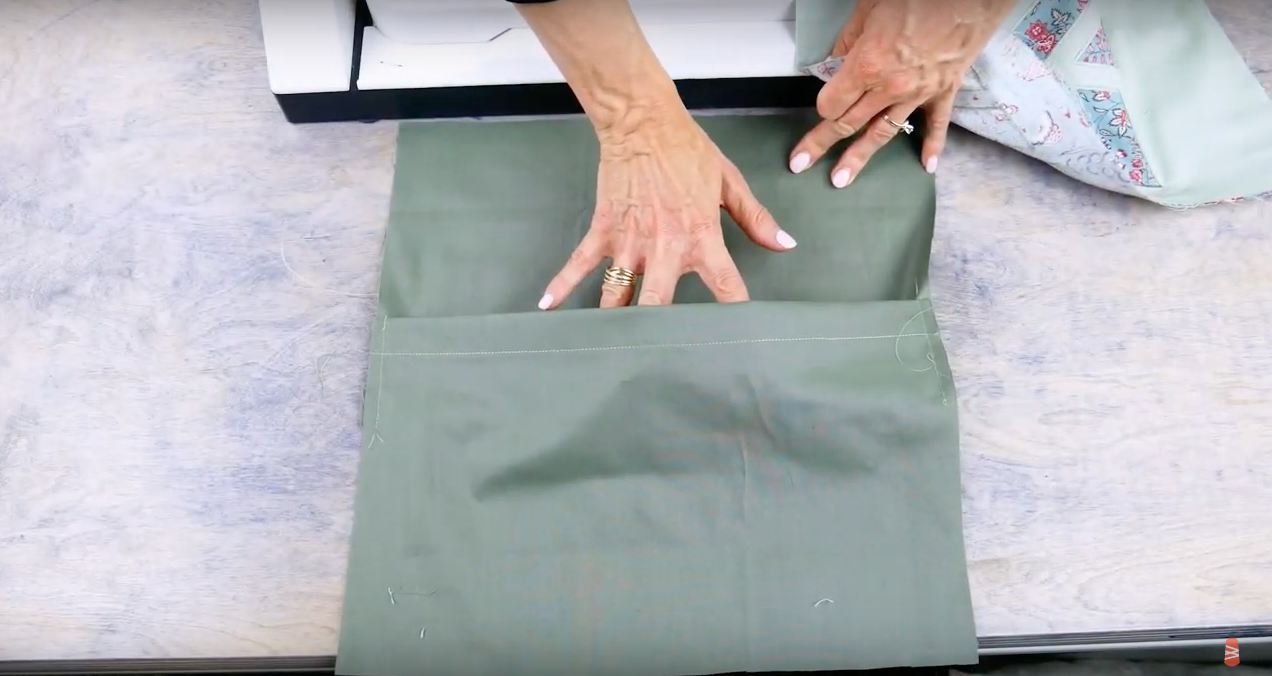
Fold your back fabric in half so that the edge of the fabric is just touching the edge of the quilt top. You don’t need it to overlap the quilt top, just have it lined up against the edge of it. Press with an iron to hold the fold in place.

7.png

Now you’re going to fold the binding over one more time. Take a glue stick and run it across your binding, then when you fold it down again it will help hold it in place. Press again with the iron to keep it stuck down snugly.

8.png

Now that you have your first folded edge, we’re going to fold the corner into a triangle making a 90 degree angle. Add another dab of glue and press it down with the iron to keep it in place.

9.png

Like before, fold the backing of the next edge down and press it in place with the iron. Take your glue stick and glue the entire edge including the folded triangle. Fold it over again and iron it down as you fold. The corner should have a perfectly mitered edge if your quilt is squared up correctly and the backing is folded evenly.

10.png

Continue these steps for the other two edges. When you come around to the last side, fold the corners on both ends of the backing into a 90 degree angle. Then fold and iron the binding down like before. Dab your glue across the entire fold including both corners and fold again, ironing it down as you go.

11.png

When you’ve finished, your quilt should have perfectly mitered corners and a binding that transitions evenly from back to front without an extra seam like you would with strip binding.

12.png

At this point you can choose to hand stitch your binding down like it’s traditionally done, or you can machine sew it which will go quicker. No matter which method you choose, we highly recommend using a finer thread in the top and bobbin. The thread we’ll be using is called DecoBob, which is an 80wt cottonized polyester thread. Because it’s so fine, it will really help to hide in the fabric so your stitches will be less visible. This is especially important if you choose to machine stitch your binding down. We recommend this thread because it’s strong enough to reliably hold your binding down without being too visible or worrying about the thread breaking.

14.png

To sew the binding down with your machine, you want to stitch as close as you can to the edge as you can. Because we tacked everything down with the glue earlier, the fabric is much less likely to shift as we sew. However, you can hold the edges down with some wonder clips if you need to. Sew all the way around your binding and don’t forget to back tack at the beginning and end.

15.png

There will be a gap at the mitered corners. These can be hand stitched close if you want to, or they can be left open if the quilt isn’t going to experience too much wear and tear. When you’re done, you have a beautifully bound quilt that smoothly transitions from back to front, and perfectly mitered corners. If you machine stitched it down with the 80wt DecoBob thread, you’ll also find that your stitches aren’t too visible either.

16.png

Inspired to sew with WonderFil threads? Find a store in your area that carries WonderFil at www.shopwonderfil.com/shop-local. You can also sign up for our free newsletter to receive more educational sewing tips, tutorials, and free patterns. Register by clicking here! We’ll see you again next time!

17.png

Free 4th of July & Canada Day Iron-On Patch Tutorial!

Maura Kang

Making your own iron-on patches is easy and full of possibilities. This is the perfect way to get creative and personalize jackets, hats, backpacks, and even suitcases. We’re celebrating Canada Day and the 4th of July with these adorable iron on patches. We’ll show you how to make your own with these embroidery designs included free for download! Once these patches are complete, you can either sew them or iron them on to whatever you like.

Free embroidery design download: https://www.wonderfil.ca/embroidery-design

We are going to use a plain white canvas type material as our base. Denim also works well for patches, but you want to choose a fabric that is fairly firm and has some body.

1.png

For the stabilizer, we have chosen this sticky stabilizer to keep our canvas nice and flat. You could also choose to hoop your fabric with a good cut- away stabilizer. If you choose a sticky stabilizer or an adhesive spray, you may want to use a super non-stick needle, so your needle runs smoothly through the fabric.

2.png

We’re choosing to stitch our design with PolyFast. Polyfast is a 2 ply trilobal polyester thread that has a brilliant sheen, and it is strong enough to withstand a fair bit of abuse, should you decide to put the patch on a bag. Polyfast is available in 210 colors, so you can easily find the right color for every design.

3.png

We’ll pair it with this 80 wt DecoBob prewound bobbin, to keep the design soft and the tension consistent. We always recommend a fine bobbin thread like DecoBob, especially with embroidery designs, as it will give you a better stitch consistency with all of the dense stitching involved with embroidery.

4.png

You will also need some fusible web, such as Heat n Bond, and some Fray Check.

5.png
6.png

Hoop the sticky stabilizer paper side up in your hoop, then score around the edges with a pin and pull up the paper to reveal the sticky side. Smooth the base material over the center of the hoop. We are also going to float a heavier stabilizer under the hoop to give the patch a bit more body.

7.png
8.png

Open the design in your embroidery machine, thread your machine with the first color, then begin to stitch out the design, changing colors as indicated on the machine.

9.png

Once your design is completely stitched out, remove the fabric and stabilizer from the hoop and cut around the design, about 1/4” from the border stitching.

10.png

Turn your patch wrong side up, then place a piece of Heat n’ bond, paper side up and with the fusible side against your patch, and iron in place.

11.png

Now, with your patch right side up, run a bead of Fray check all along the border stitching line. This will help to keep the fabric edges from fraying once the patch is cut out.

12.png

When the Fray Check has dried, use a sharp pair of scissors to trim closely to the border stitches, taking extra care not to cut into the stitches themselves. Now run a second bead of Fray check along the edges, to further weld down any stray threads.

13.png
14.png

Once the Fray Check has dried, the paper backing can be peeled off the patch, so you can iron it on to your chosen article. You can then choose to stitch it down by hand for extra security, if you’re putting it on something like a bag or suitcase.

15.png
16.png

Adding patches to your clothing or bags is a fun way to add some whimsy to your style, and to show your patriotic spirit for Canada Day or Independence Day. Let us know in the comment section below what you like to dress up with patches! Inspired to sew with WonderFil threads? Find a store in your area that carries WonderFil at www.shopwonderfil.com/shop-local. You can also sign up for our free newsletter to receive more educational sewing tips, tutorials, and free patterns. Register by clicking here! We’ll see you again next time!

17.png
18.png

Getting Started With Crochet: Beginner Stitches

Maura Kang

We’re here to teach you a few basic crochet stitches that will help introduce you to crochet! This is a fun, relaxing pastime that is easy to take with you on long road trips or on the go. Once you master these basic stitches, it’s easy to create a variety of different projects.

These basic stitches can be used to create the top for this cute little girl’s dress. We’ve included the FREE crochet pattern for this top which can be downloaded and printed by clicking here. This pattern uses each of the crochet stitches shown in the video below.

2.png

The dress was created using Eleganza #3, a high quality, long staple Egyptian cotton. For the beginner crocheter, you will appreciate the quality, as it is not prone to twisting and tangling. It is the heaviest weight of Eleganza, which also makes it great for beginners. We will also be using a 3.5 mm crochet hook.

3.png

To learn these stitches, check out the video below for detailed step-by-step instructions.

1. Chain Stitch (CH)

1. Chain Stitch (CH)

2. Single Crochet (SC)

2. Single Crochet (SC)

3. Double Crochet (DC)

3. Double Crochet (DC)

4. Double Crochet in One Spot

4. Double Crochet in One Spot

5. Double Crochet, Chain 3, Double Crochet in One Spot

5. Double Crochet, Chain 3, Double Crochet in One Spot

6. Scallop Edges

6. Scallop Edges

7. Half Double Crochet (HDC)

7. Half Double Crochet (HDC)

8. Treble Stitch (TR)

8. Treble Stitch (TR)

9. Slip Stitch

9. Slip Stitch

Don’t forget, to learn how to these stitches, check out our video for details step-by-step instructions!

That’s all you need to know to create the dress pattern. It would be a good idea to practice some of these stitches before you begin to get used to the motion. One of the difficulties beginners will encounter is recognizing the skip stitch at the start of each row, so as not to unintentionally increase or decrease your stitch count in each row. So at first, practice doing a piece of either just single crochets or double crochet, to make sure you can keep your stitch count the same row to row and your piece straight and square. The stitches for the butterfly and flower addition to this top are a bit more complicated, so let us know if you would like to see another crochet tutorial for those.

Thanks for tuning in. Please send us pictures of your finished dresses; we would love to see them! Don’t forget to leave a comment in the comment section below and let us know what you would like to see next. Inspired to sew with WonderFil threads? Head on over to shopwonderfil.com/shop-local for a list of stores and retailers you can purchase from. You can also sign up to receive weekly sewing tips, free patterns, and tutorials in our newsletter. Register by clicking here! You can unsubscribe at any time by clicking the unsubscribe button on the footer of every email you receive.

Best Practices to Store Your Sewing Thread

Maura Kang

Are you an avid collector of thread? No matter the size of your stash, it’s always good to keep in mind these thread storage best practices so your thread will stay in top condition for whenever you want to sew with it next. These simple tips will help prevent your thread from early fading and aging.

Are you an avid collector of thread? No matter the size of your stash, it’s always good to keep in mind these thread storage best practices so your thread will stay in top condition for whenever you want to sew with it next. While thread doesn’t have a set expiry date, there are a few factors that can lead to faster aging. These simple tips will help prevent your thread from aging early, which can lead to weakened thread and faded colors.

1.png

If you love to show off all the pretty colors in your thread stash, you might mount them on your wall. There’s no better way to decorate your sewing room than with a wall full of gorgeous threads, and this makes it really easy to see all the colors you have to choose from all at once. However, if you’re storing your threads out in the open this way, it’s a good idea to take note of the sun exposure in the room. If you have a lot of sunlight shining on your threads for hours every day, the UV light can speed up the breakdown of the thread fibres, leading to weakened thread that breaks more easily after years of exposure.

2.png

This UV light can also cause the thread color to fade on the exposed surface, especially with red colors. These aren’t things that will happen overnight, but if you’re going through some of your threads more slowly, it can happen if you’re not paying attention over a few years. So, if you have some threads that you don’t use as often, it might be better to put them away in a closed container away from the sun.

3.png

Choose a home storage container with opaque drawers or boxes, something that the sun won’t penetrate. Keeping your threads put away in a closed container will also prevent dust from landing on the thread. While dust won’t impact the quality of the thread itself, it can come off while you’re sewing with it in the machine, adding to the lint build up inside.

Something to consider while your threads are stored in containers is the use of a Wonder Guard. This little sheet wraps around your spool of thread and stops it from unravelling. It’s perfect for organizing your thread and will prevent a lot of mess and tangles in your storage containers.

4.png

Another factor to consider is the climate you live in. If your home is somewhere very dry, you may wish to consider running a humidifier in your house. An excessively dry climate can also lead to the fibres of your thread drying out and weakening as a result. On the other hand, a very moist climate can also cause thread fibres to break down. You should choose to store your threads in a location in your home that isn’t too hot and dry, like near your furnace, but also away from direct water exposure.

5.png

We hope this helps you choose the best storage space for your threads so they can keep working long and hard for you! Inspired to sew with WonderFil threads? Head on over to shopwonderfil.com/shop-local for a list of stores and retailers you can purchase from. You can also sign up to receive weekly sewing tips, free patterns, and tutorials in our newsletter. Register by clicking here! You can unsubscribe at any time by clicking the unsubscribe button on the footer of every email you receive.

7 Ways to Use Iron Fusible Thread

Maura Kang

We’re going to show you a very useful tool for your sewing room: iron fusible thread. You can use this either in your bobbin or as a top thread, and it’s a great way to do everything from appliqué, lining up fabric patterns, or even making the perfect quilt binding. WonderFil’s Iron ‘n Fuse thread will actually melt and glue your fabric down when exposed to the heat of an iron. But it’s not permanent, you can still pull it up and move your pieces around, then re-fuse it in place if you don’t like the placement. There’s a lot of things you can use it for, so let’s check them out.

1.png

1: Matching stripes, plaids, & patterns:

You don’t need a sewing machine for this one. Lay the thread on the right side of the fabric, along where you want the seam to be. Then take your second piece, line the pattern up to where you want it, and leave it right sides facing together. Give your fabric a quick press and the fusible thread will keep everything in place without pins!

2.png

2: Applique:

Wind the Iron ‘n Fuse on an empty bobbin and use a regular sewing thread on top. Stitch around the appliqué shape, press, remove the top thread, and then trim closely. Use a decorative stitch on the raw edges of the fabric to finish appliquéing it down. The result is a natural looking appliqué without the stiffness of fusible interfacing; it also helps to reduce the puckering caused by using pins. If you happen to place your appliqué incorrectly, you can peel it up, move it and re-fuse it in place.

3.png

3: Binding a quilt:

Place your folded binding on the wrong side of your quilt. Use a tight zig zag to attach it to the quilt, with fusible thread in your bobbin and regular thread in the top.  Now turn your binding to the right side and fuse over the seam. You can now stitch your binding down, stitching close to the edge of the binding. You will be sure to catch the underside of your binding.

4.png

4: In the lower loopers of a serger: 

Serge around your hemline with fusible thread in the lower looper of your serger and regular thread in the needle and upper looper. Turn up hem and fuse, then turn your work to the right side and stitch for a simple turned up hem.

5.png

5: Curved hem:

Run a row of long basting stitches along your curved hem edge, with a regular thread in the needle and the fusible thread in the bobbin. Gently pull up on your bobbin thread to ease in the shape of your curved hem, and then fuse your hem in place. This will make hand stitching your hem in place easier. You could also turn your work right side up to machine stitch your hem without worrying about the hem being distorted on the underside.

6.png

6: Placing zippers:

Baste your zipper opening closed, then press the seam open. Run a row  of stitching along both seam allowances, with the fusible thread in the needle and the bobbin. Center your zipper under your seam, and press both sides to fuse down the seam allowances and at the same time fuse your zipper in place. You can now stitch around your zipper without worrying about it shifting. When your stitching is complete, remove the basting thread that holds the opening closed.

7.png

7: Making pleats crisp:

Mark your pleat lines on your fabric (both inside pleats and outside pleats). Now stitch a scant 1/8” away from the marked lines, with regular thread in the top and fusible thread in the bobbin (the bobbin thread should be on the inside of the pleat). Using a press cloth, press along your marked lines. The fusible thread will help to make the pleats crisp.

8.png

Let us know how you like to use iron fusible thread in the comments, or if this blog inspired you to try something new using iron fusible thread! You can also watch these tips in action in the video below.

Inspired to sew with Iron ‘n Fuse? Head on over to shopwonderfil.com/shop-local/ for a list of stores and retailers you can purchase from. You can also sign up to receive weekly sewing tips, free patterns, and tutorials in our newsletter. Register by clicking here! You can unsubscribe at any time by clicking the unsubscribe button on the footer of every email you receive.

Metallic Embroidered Tie Tutorial (Free Embroidery Pattern Included!)

Maura Kang

If you’re looking for that perfect gift for the father, husband, or friend in your life, this personalized embroidered tie will make a statement in any board room. We’ve even included 3 free digitized embroidery designs for you to download! All you need to do is choose your thread colours and add initials.

We have included 3 totally free digitized designs for you to download: a game controller, a fish and a bug. You can choose which you’d like to download and in what file type by clicking here. We are showing the finished product with a personalized monogram, but we leave these for you to add, so you can have the right initials.

1.png

We have chosen to use a purchased black tie as the backdrop for our embroidery. You can choose any color, but a solid color will show off the design better. To fit the included designs, the tie must be at least 2 inches wide at the point where you want your design to sit.

2.png

We have decided to stitch out the design in WonderFil’s metallic thread, Spotlite. Spotlite is a 40 wt metallic with a rayon core. Since rayon has no stretch, the core won’t stretch as a polyester or nylon core might. That stretching can cause the metallic wrap to separate, which causes the shredding and breaking that sometimes happens with metallic threads. Since the rayon core in Spotlite doesn’t stretch, that is less likely to happen, so you will have trouble free embroidery stitches, and a soft finish to the design.

3.png

We will be pairing the Spotlite with our 80wt DecoBob in the bobbin. Even very dense stitching stays soft when you have a fine bobbin thread and the evenly wound prewound bobbins will also ensure that you have no tension issues as you stitch out your design. As always, we will be using a Thread Tamer and a WonderGuard to tame the curl in the metallic thread, and a large eye 90/14 topstitch needle. As you will be using a sticky stabilizer to stabilize the tie, you can also use a universal super nonstick needle as another option. See our video on stitching trouble free with metallic thread without the headache to learn our tricks on sewing with metallic thread.

To begin, we will hoop this sticky stabilizer, paper side up, in the hoop. We are going to lightly score the paper around the edge of the hoop with a pin, and from corner to corner, so we can easily pull the paper away. Mark the center so you can easily place your tie on the right spot.

4.png

Decide where you want the center of your design to sit on the tie and mark the spot with some tailor’s chalk. With a stitch ripper, open up the back of the tie for at least 6”, so your tie can sit flat and open on the stabilizer. Using your hoop grid, place the tie centered on the hoop and smooth and press it in place so it sits flat and even.

5.png
6.png

Download the digitized design you prefer, in the format appropriate for your embroidery machine. If you choose, add the text or monogram from your machine’s text to the design before proceeding. Thread your machine with Spotlite in the first color, with a Decobob prewound bobbin in the bottom. Stitch out the design, changing colors as indicated. We have included the color numbers of Spotlite we used for our designs.

7.png

When your stitchout is complete, remove the stabilizer from the hoop and trim away on the underside of the tie. Trim all the threads, then using a hand needle and DecoBob, hand stitch the back of the tie closed again.

8.png

And there you have it. The man in your life will be proud to wear this fun, customized tie, and it is sure to be a conversation starter!

9.png

Inspired to sew with WonderFil threads? Head on over to shopwonderfil.com for a list of stores and retailers you can purchase from. You can also sign up for our free newsletter to receive more educational sewing tips, tutorials, and free patterns. Register by clicking here! We’ll see you again next time!

The Easiest Way to Hem a Pair of Jeans

Maura Kang

Rather than rolling up your jeans or taking them to an expensive tailor, why not hem them yourself? This is one of those life skills that’s easy enough for anyone with a sewing machine to do themselves. Wearing jeans that are too long can wear away the denim around the heel in an ugly way. We’re here to show you our tried and true method of hemming jeans easily and quickly for a perfect fit. We’ll also show you our recommendation for notions that will give you the best look and results.

To begin, you’ll want to grab a piece of tailor’s chalk, preferably in white or another contrasting colour from your denim. Put on the pair of jeans that are too long and turn up the fabric under the wrong side of the pants until it’s at the desired length. We recommend doing this step while wearing shoes to ensure you take this extra height into consideration. It may help to have someone do this for you so you’re standing straight. Make a mark at the base of the fabric at the desired length using the tailor’s chalk.

1.png

Now measure the distance from the mark to the bottom of the original hem. You’ll want to mark the other leg at the same distance so they are the same length. Lay one of the legs flat and place a ruler straight against the line. Extend the line all the way down the fabric.

2.png

Holding the ruler in place against the line, you can flip over the pant leg over the ruler and continue drawing the line to the other side of the leg, being careful to keep it straight. You should now have a straight line running on both sides of the pant leg.

3.png

Do the same with the other pant leg. Now that both legs have been marked, you’ll want to mark your fold lines next. On the side of the line closer to the bottom of the pant leg, measure another half inch and make a new mark.

4.png

Now measure another half inch from your new mark, and make a third mark. You’ll want to once again extend these lines straight all the way around the pant leg on both legs. You should now have 3 solid straight lines travelling around both your pant legs.

5.png

Using a pair of sharp fabric scissors, cut off the pants closely following the bottom line, the one closest to the bottom of the pant leg. Do this for both pant legs. You can now begin sewing your new hem!

6.png

Most denim jeans will have a thick gold coloured thread, so it’s best to choose a thread that matches it to look consistent with the rest of the pants. We’ll be using this 12wt cotton thread called Spagetti in the bobbin. It’s a heavier than your usual 40 or 50wt thread, and closely resembles the decorative contrasting brown or golden thread used on jeans. The two Spagetti colours that tend to match most with this jean thread is SP11 or SP21. For this pair of jeans, I’ll be using colour SP21.

7.png

Because we’re using a thicker thread underneath, we want to use a finer thread in the needle. This will ensure the thread doesn’t struggle through the fabric, and it will give you a better stitch consistency and quality. But you don’t want just any finer thread up top, you want to make sure it is strong enough to hold your denim fabric together for a good long time.

We’ll be using DecoBob 80wt thread in the needle. This is a strong but lightweight polyester thread that is ideal to pair with Spagetti in the bobbin. We used a regular 80/12 size needle, however if you find your machine is struggling with the thicker denim fabric, you can also use a denim needle.

8.png

Don’t forget to increase your machine’s stitch length to 3.1. This will help with the machine’s tension when using the thicker 12wt thread, and also match the stitch length showing on the jeans.

Once the machine is set up, you can begin sewing. Roll up the hem following the remaining two lines so that the raw edge is tucked away. If you feel confident with keeping it straight you can begin sewing right away. However, we recommend beginners clip their hems in place to prevent it from moving using sewing clips. We prefer sewing clips instead of using pins because the thick denim can be difficult to penetrate with pins, and it doesn’t cause any puckering.

9.png

You’ll want to sew on the inside of the pant leg so you can follow the edge of the new hem. This way, your heavy 12wt thread in the bobbin will show on the right side of the pant leg.

We recommend starting on the bump of one of the side seams to hide your backstitching. Because of the thickness of the fabric in this area, you may need to gently turn the handle on the side of your sewing machine to manually sew the first few stitches. Sew close to the edge of the hem, being careful to keep your stitching straight and consistent. When you return to your start point, sew over the original stitching and don’t forget to backstitch again.

10.png

Trim your threads and you’re finished! You’ll have a new perfectly fitting pair of jeans that you hemmed yourself.

11.png

Inspired to sew? Head on over to shopwonderfil.com/shop-local/ for a list of stores and retailers you can purchase WonderFil threads from. You can also sign up to receive weekly sewing tips, free patterns, and tutorials in our newsletter. Register by clicking here! You can unsubscribe at any time by clicking the unsubscribe button on the footer of every email you receive.

Hand Stitched Buttonholes Tutorial

Maura Kang

With all the beautiful machine buttonhole stitches out there right now, why bother making hand stitched buttonholes? Sometimes, you want to add a beautiful vintage look to your project. Or you might be working with a very heavy coat fabric and are struggling to get nice machine buttonholes. Or maybe you just want to add that extra special look to a project.

Handstitching your buttonholes can add a vintage look to your finished project, and choosing the right threads will give it a professional polish that will make it worth the extra effort. We’ll show you step by step how to mark, stitch, and cut your buttonholes for perfect results each time.

We are going to use this extra fine 100wt thread, InvisaFil, to stitch together the edges of our buttonhole. As the thread will be sitting under the decorative stitches, we don’t want it to show or add any bulk. Invisafil is a 100 wt polyester, so, while it is strong, the stitches will disappear in the fabric and won’t be seen.

1.png

We will also need a gimp thread to add extra strength and a bit of lift to our buttonhole. For this we will be using HomeDec. HomeDec is a very strong polyester thread that comes in three weights (30wt, 40wt, 60wt). We will be using the heaviest 40wt for this project, in a color to match the fabric.

2.png

For our decorative buttonhole stitch, we will use this 12wt double gassed cotton thread called Spagetti. The tight twist will make stitching easy, and the 12 weight thread gives a nice bold finish to the buttonhole.

3.png

We will need two hand stitching needles. For the fine InvisaFil thread, we’ll be using a #11 sharp needle. And for stitching with the heavier Spagetti, we will use a #7 embroidery needle which has a larger eye to accommodate the thicker thread.

4.png

Using a spacing tool and some tailors chalk, evenly mark the starting point of each of your buttonholes.

5.png

As buttons all have different depths, here is a trick to mark the length of your buttonhole. Wrap your chosen button with a piece of twill tape, going around the fullest part of the button. Pin the ends of the twill tape.

6.png

Now pull out the button and lay the tape flat. The distance from the pin to the folded edge will be the length of your buttonhole.

7.png

Measure this length and mark the end of each buttonhole. Use a straight edge and some chalk to mark the buttonhole line.

8.png
9.png

Using a buttonhole cutting tool like this one by Clover, cut along this line. Cut and finish only one buttonhole at a time.

10.png

Thread a #11 sharp needle with InvisiFil, tying an overhand knot right behind the eye of the needle to prevent it from unthreading. Now begin to do a close whipstitch all along the open edge of your buttonhole, to hold the layers together.

11.png

Next, thread a #7 embroidery needle with a length of the Spagetti. Now, cut a length of the HomeDec thread twice the length of the buttonhole plus another 1 inch. (We’re using a bright, contrasting color in this demonstration so you can see it, but if you do it yourself, you should choose a thread color that matches the fabric). Hold or tape the gimp thread along the cut edge of the buttonhole. Starting at the back end of the buttonhole begin working a buttonhole stitch along the edge, catching the gimp thread underneath your stitch.

12.png

Work the buttonhole stitches close together to for a nice pearl edge along the cut edge of the buttonhole. When you get to the front end of the buttonhole work 3 or four stitches around the curve, before going back down the other side of the buttonhole, making sure to still catch the gimp thread underneath.

13.png

When you are back at your starting point, work a tack stitch of 3 to 4 stitches across the width of the buttonhole.  Pull your thread to the underside and thread the end through the under side of your stitches before trimming it off. Thread the gimp thread through the large eye needle thread it to the underside, and cut it off. Repeat this for all of your buttonholes.

14.png

That is all there is to it. While this is a bit time consuming, it will definitely add a special touch to your project. Pictured below is a finished buttonhole with a gimp thread that matches the color of the fabric.

15.png

Inspired to sew with WonderFil threads? Head on over to shopwonderfil.com for a list of stores and retailers you can purchase from. You can also sign up for our free newsletter to receive more educational sewing tips, tutorials, and free patterns. Register by clicking here! We’ll see you again next time!

Sewing the BEST Stitch in the Ditch Tutorial

Maura Kang

Stitch in the ditch is a technique where you sew directly in the fold of a seam to hide your stitching, while securing your quilt block down. This way you don’t see any quilting around that area of the block. If you’re looking to sew stitch in the ditch on your latest quilt or project, we have the best tips on making it look invisible and perfect. Let’s take a closer look!

The first and most important thing to do before you even begin is choosing the right thread. We recommend using InvisaFil, a 100wt cottonized polyester thread that is incredibly fine and hides in the fabric wherever it’s stitched. A basic colour such as grey, or a color that even slightly matches the fabric will be enough for it to hide almost completely. This will ensure your stitching shows as absolutely little as possible, even if you accidentally sew outside the seam.

1.png

Because this thread is finer, you can choose a 70/10 or 80/12 size needle. This smaller needle will punch a smaller hole in the fabric so that the fine thread won’t be sitting in too large of a hole.

2.png

You can use the same thread in the bobbin, or alternatively a similar thread called DecoBob. DecoBob is also a cottonized polyester thread, but it’s marginally thicker at 80wt. This gives your stitching a slightly stronger hold and it also is available as convenient pre-wound bobbins. These pre-wounds will give you a better stitch consistency and even tension.

3.png

Choose a machine foot that is marks the center needle position. This makes it easier to line up the seam you’ll be stitching into.

Start from one end of the seam and carefully sew all the way to the end. Don’t forget to back stitch at the beginning and end.

5.png

Don’t worry if you fall off your path a little, if you’re using the correct thread then it won’t even be visible.

6.png

That’s actually all there is to it! Simply choosing the right tools for the job is the best way to get perfect results, even if it’s your first time trying this technique.

7.png

You can find a list of stores that carry WonderFil threads on www.shopwonderfil.com/shop-local/. You can also sign up to receive weekly sewing tips, free patterns, and tutorials in our newsletter. Register by clicking here! You can unsubscribe at any time by clicking the unsubscribe button on the footer of every email you receive.

Easy English Paper Piecing Tutorial

Maura Kang

English paper piecing is hand sewing technique where fabric is wrapped around a paper template to create a precise design. These pieces are then hand stitched together into a pattern that can be used in quilts, crafts, or decorating any sewing project you like!

It’s great for designs that don’t have long straight sides, but instead have numerous set-in corners, such as hexagons or diamonds. It’s also very portable, meaning you can work on your project while travelling, and is wonderful for meditative hand stitching.

WonderFil has come up with a popular thread that will allow paper piecers to have the tightest, flattest seams possible. You may have heard of it. It’s called InvisaFil, and this is a 100wt thread, meaning it’s incredibly fine. It disappears almost completely into your fabric, and because it’s so thin, it allows your pieces to sit snugly against each other.

1.png

Since we’re using such a fine thread, we want to use a needle with a smaller eye. A #11 or #12 sharps needle will work well since the eye is small enough that the thread won’t slip out easily.

2.png

You’ll also want your paper template which can be purchased pre-cut like these, or you can print your template on cardstock and cut them out. Paper piecing templates are available in all shapes and sizes, but today we’re going to be demonstrating with the traditional hexagon.

3.png

You will also need your fabric, which will need to be cut larger than the template to allow for turn over. We like to cut them with a generous quarter inch allowance on each side.

4.png

As an option, some people like to use fabric glue to shape the fabric around the template. The advantage of glue is that it is fairly easy to prepare your pieces. The disadvantage is that it is a bit harder to remove the paper backing once you’ve joined the pieces. The alternative is putting small stitches in the fabric behind the piece, so we’ll demonstrate both methods so you can choose the best one for yourself.

Now to begin, we’re going to prepare the hexagons. Here is our template and fabric, and you can see that we’ve cut our fabric larger than the template. First, we’re going to demonstrate using glue to attach the fabric to the paper.

6.png

Place your fabric right side down and center the template on the fabric. Run a line of glue along one side of the template and press the fabric down, making sure to keep the template centered and the fabric wrapped tightly over the edge.

7.png

Now run another line of glue along the joining side of the hexagon, making sure to get glue on the folded fabric from the previous fold. Push the corner in as you press this row down, once again keeping your template centered and the fabric firmly folded over.

8.png

Continue along each side until all the sides have been secured down.

9.png

Now we’re going to show you how to hand stitch the fabric to the template. Here’s our threaded needle, and when we’re using a fine thread like InvisaFil, we like to make a small hand-over knot in the thread right behind the eye of the needle. Because the thread is so fine, this won’t impede your stitching, but will prevent your thread from slipping out of the needle.

10.png

Now we’re going to knot the tail of the thread with a good knot. When you take your first stitch, take care to pull gently so as not to pull the knot through the fabric. When you take a few stitches in one spot, your thread will be secure.

11.png

First, finger press one side down, keeping your template centered. Now use your finger to push the corner in and finger press the next side over. Holding the corner down with your finger, take a few small stitches in the corner using a simple whip stitch.

Moving to the next corner, repeat this process. The thread will run along the side of the hexagon, parallel to the edge. Pull your stitches firmly to keep your edges tight and continue to work around your piece until all six sides are secure.

12.png

When you’re finished, take a few more small stitches in the first corner, knot the thread, and trim.

Now that we’re done our first piece, we’re going to give it a quick press with the iron to further sharpen the edges.

13.png

We’re now going to join the pieces together. First lay out your design and decide where you want to place each piece. Lay your adjoining pieces right sides together, working from the centre out. Thread and knot your needle as we showed before.

14.png

Starting exactly in the corner, take a few small whip stitches making sure to only catch a tiny amount of the fabric from both sides. Now you can begin working your way across, doing a small whipstitch and again trying to catch only a tiny amount of both fabrics with each stitch.

15.png

When you reach the next corner, take a few small stitches again in the exact corner of both sides. This will secure your stitching so it doesn’t come out. Your first two pieces are attached!

16.png

Now you can attach your next piece to the centre piece in the same manner again. Remember again to stitch in the exact corner and catch both ends of fabric. Continue until all the pieces are joined to the centre piece.

17.png

To join two of the outside pieces together, you’ll notice that we won’t be able to place this piece right sides together like before, so we’ll need to work from the underside and join them again with a whip stitch. Folding them slightly towards each other will make it easier.

18.png

After your design is completely, you’ll want to remove the paper templates. Sticking a pin into them will help you to pop them out. If you used glue, a light spray of water can help you pull the template free.

19.png

Not all designs have a circular flower, but once you master this, you’ll be able to play with your layout and paper piece any shapes in any arrangement! Leave a comment if you have any questions or something to share about your EPP experience. 

You can find a list of stores that carry WonderFil threads on www.shopwonderfil.com/shop-local/. You can also sign up to receive weekly sewing tips, free patterns, and tutorials in our newsletter. Register by clicking here! You can unsubscribe at any time by clicking the unsubscribe button on the footer of every email you receive.

20.png

Easy Serger Blanket Stitch Tutorial

Maura Kang

Here’s a super quick and easy tutorial on how to make a quick machine “blanket stitch” edging on your serger. A two-thread flatlock stitch and some water soluble stabilizer will produce a beautiful, hand finished look. It’s a great way to finish blankets or other projects with this incredibly fast and simple serger solution.

Let’s start by setting up the serger. You will need a serger that has the capability to do a 2 thread flatlock stitch. Most sergers are able to do this, so check your manual to set up your machine.

1.png

A bold thread will have the best effect for this stitch, so we’ll be using a 12wt variegated cotton called Fruitti in the needle. This thread has been double gassed, resulting in a very low lint finish, so the stitches will look clean and beautiful when it stitches out. Another option is 12wt Spagetti which is the same thread as Fruitti, but comes in solid colors.

2.png

You’ll need a 90/14 topstitch needle in the serger to accommodate the heavier thread.

3.png

In the loopers, we’ll be using this medium 50wt cotton thread called Konfetti in a colour that matches the blanket. The finer weight works well with the heavier Fruitti thread.

4.png

For the blanket, we’re choosing this cotton flannel which is warm and soft to the touch. You can choose to do a single layer, a double layer, or a double layer with batting in the middle. Be aware to follow fire safety regulations when choosing fabric for babies.

5.png

Before you begin, cut a length of water soluble stabilizer long enough to go around the edge of your blanket, with a width of about 3 inches. You can use pieces so you do not need one continuous length.

6.png

Set up the serger to do a 2 thread flatlock stitch, with a wide cutting width. Place a strip of the wash away stabilizer along the right edge of the blanket and stitch along the edge of the fabric. The stabilizer will lay on top of your project. Continue around the circumference of your blanket, making sure the knife of the serger is cutting off a small strip along the edge as you sew.

7.png

When you have finished going around all four edges, remove your work from the serger, leaving a tail to finish off.

8.png

Tug on the wash away stabilizer all the way around to pull the stitches to the back and leave a “blanket stitch”. Trim the stabilizer close to your stitching, taking care not to cut into your serger threads. Rinsing the finished project will remove the remaining water soluble stabilizer.

9.png
10.png

Weave the thread ends into your edging using a large eye needle. A drop of fray check will prevent them from unraveling later.

11.png

If your blanket is rectangular, you will go off the edge at each corner. After you have finished your piece, you will need to go back and weave in the serger threads at each corner to finish.

If you make the corners of your project a slow curve, you will not need to finish loose ends at each corner. In this case, begin your stitching line along one edge, not on a corner. When you come to the end, you will need to overlap your starting stitches, then slowly edge your way off the fabric, trying not to create a ‘point’. You will have only one set of loose threads to weave in.

12.png

And that is all there is to it! In minutes you will have a nicely finished blanket! This is perfect for making receiving blankets for babies, a simple blanket for yourself or your family, or quickly finishing the edges of a project off.

Ready to start sewing? You can find a list of stores that carry WonderFil threads on www.shopwonderfil.com/shop-local/. You can also sign up to receive weekly sewing tips, free patterns, and tutorials in our newsletter. Register by clicking here! You can unsubscribe at any time by clicking the unsubscribe button on the footer of every email you receive.

Needle Punch Tutorial & Free Patterns!

Maura Kang

Needle punch is a simple way you can easily and quickly create beautiful stitched patterns and designs. We’ll show you how to set up your needle punch tool, our recommended thread and materials, and walk you through simple tips on how you can use this technique to create different textures and stitches. We’ve even included a few FREE printable patterns below to help get you started on your next needle punch project!

Materials:

  • Download one the free patterns by clicking here.

  • Recommended thread: Eleganza™ #8 perle cotton thread: https://shopwonderfil.com/product-category/eleganza/

  • Needle punch tool (we used one by Clover)

  • Embroidery hoop (to fit the free patterns above, we used a 5.5” hoop)

  • 100% cotton monk’s cloth with an even weave

  • (optional) A light table to trace your pattern onto the fabric, we used one by Daylight

  • Clear glue

0.png

Before you can begin needle punching, you’ll need to prepare your fabric. Download one of the patterns from the link above or select one of your own. You can trace this pattern onto your monk’s fabric using a light table or by holding it up against a window. Some patterns can also be transferred using an iron or with carbon paper and will come with instructions on how to do so.

1.png

We recommend using a 100% cotton monk’s cloth with an even weave as this will be the easiest to keep your stitches looking consistent and straight.

2.png

Once your pattern is traced, hoop the fabric tightly in an embroidery hoop. For the free patterns available above, we used a size 5.5” hoop. You can then proceed to load your needle punch tool with thread. Our recommendation is a #8 size perle cotton as this will offer enough friction in the fabric to hold, while still showing boldly. We used #8 Eleganza perle cotton as it has a very tight twist which prevents untwisting, and a low lint finish that allows it to pull easily through the fabric.

3.png

Your needle punch should come with a needle threader. Slide it through the tool from the base of the needle so that the threader is facing the top end of the punch. You can then slide the thread through the threader loop and pull it back through the punch, drawing the thread with it through to the base of the needle.

Inserting the needle threader.

Inserting the needle threader.

Sliding the thread through the needle threader’s loop.

Sliding the thread through the needle threader’s loop.

Drawing the needle threader back out, pulling the thread with it. Your needle punch is now threaded!

Drawing the needle threader back out, pulling the thread with it. Your needle punch is now threaded!

Leave a tail of a few inches of thread and slowly begin punching through the fabric, filling in the design. You’ll notice two sides to the fabric, one that sticks out with loops, and the backside which is shorter. You can choose to make either side your “right” side.

Front side.

Front side.

Back side.

Back side.

For reference, the side you do the punching from will be the “back side” of the fabric, while the opposite side will be the “front side”. When you’re finished filling in a section, trim away the thread and secure the back side with clear glue.

9.png

To create an optional fun texture, you can take a pair of scissors and cut the loops on the front side of the fabric, releasing them. You’ll end up with a soft and fuzzy texture that can be trimmed down around the edges of the design to keep the edges clean and crisp.

Cutting the loops.

Cutting the loops.

The resulting texture after cutting the loops.

The resulting texture after cutting the loops.

To change the texture and add a bit of contrast in the design, we’ll be flipping the hoop over and punching from the “front side” instead of the “back side”. Since these stitches will now be more visible, an option while you’re filling in the design is to move back and forth in a zig zag pattern. This creates an even satin stitch that mimics the shape of the leaf.

12.png

Once again, when you’re finished filling in a section, trim away the thread and apply clear glue to secure the stitches at the start and end of the thread.

13.png

Play with the side you punch from to create a variety of textures for your project! Continue these steps until your design is complete. Below is the front side of our hoop.

14.png

To finish your hoop, trim the fabric to the edge of the hoop. We’ll be leaving our design in the hoop to frame and hang it.

15.png

Experiment with the textures you can create using this fun and simple tool! This is a versatile way to efficiently fill in designs in by hand and get creative.

16.png

Feeling inspired? This needle punch is available from Clover. You can find Eleganza™ in a whopping 340 unique solid and variegated colours to play with. Find it in a local store near you at www.shopwonderfil.com/shop-local or to order it online. Share your needle punch projects with us on social media using #wonderfil, we’d love to be inspired by you!

You can also sign up to receive weekly sewing tips, free patterns, and tutorials in our newsletter. Register by clicking here! You can unsubscribe at any time by clicking the unsubscribe button on the footer of every email you receive.

Visible Mending on Denim with a Sashiko Stitch

Maura Kang

Have your jeans sprouted a new hole? While distressed denim might be in, you can still salvage a beautiful aesthetic using visible mending. This is a gorgeous way to repair a hole in a piece of clothing and refresh your wardrobe, turning ugly holes into something beautiful and intentional.

Screen Shot 2020-04-09 at 11.15.22 AM.png

Materials:

-       A scrap piece of denim or other heavy fabric large enough to completely cover the hole you are patching, with at least 3 inches to spare on each side.
-       A thick hand embellishing thread. We will be using #8 Eleganza perle cotton thread as it stands out beautifully and is ideal for any hand embellishment.
-       A hand sewing needle that will fit your thread. We recommend using a sashiko needle as it has an eye large enough for the heavier thread, and also is much longer, making it easy to make a lot of stitches at once.  You can also use a long embroidery needle, such as a long darner, as another alternative.
-       We also recommend using a thimble while doing this technique. Because of the number of stitches we have to make it will allow you to stitch more effectively and keep your finger from bruising.


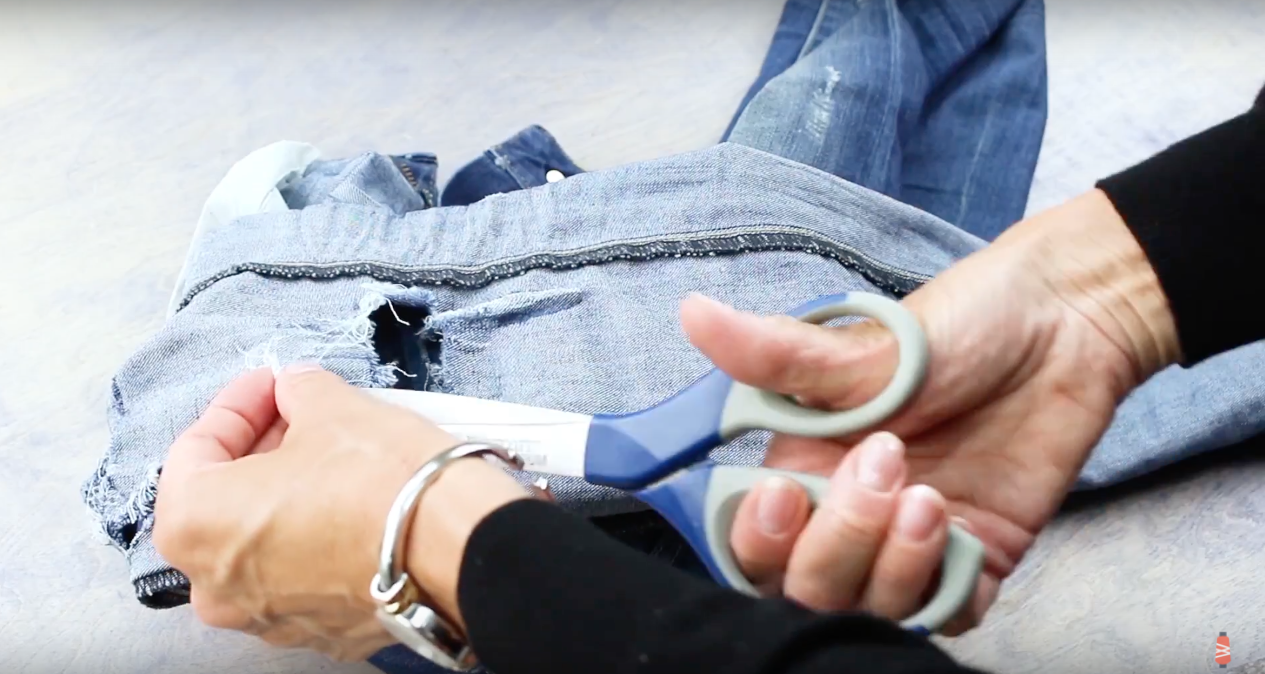
To begin, turn the jeans inside out and find the hole you want to repair. Then you’ll want to trim the excess thread around the hole to clean it up.

Screen Shot 2020-04-09 at 11.30.30 AM.png

Once the edges of the hole are trimmed and straight, place your denim scrap over the hole. Ensure that you have at least 3 inches of extra fabric around each side of the hole and pin it in place.

Screen Shot 2020-04-09 at 11.33.09 AM.png
Screen Shot 2020-04-09 at 11.33.23 AM.png

Now turn your jeans back right side out. Be careful not to get caught up on any pins. You’ll actually be able to see from the right side where you’ve placed the pins around the edge of the scrap denim, so you can use this as a guide to know where not to stitch outside of the area.

Screen Shot 2020-04-09 at 11.36.34 AM.png

Thread your needle and tie a knot at the end of your thread. You can hide your knot by starting between the two layers of fabric.

Screen Shot 2020-04-09 at 11.39.03 AM.png

Depending on what design you may want or your sewing experience, you can just do straight lines, curved, or something else funky if desired. We are going to keep it simple and just do a simple straight running stitch.

Screen Shot 2020-04-09 at 11.56.57 AM.png
Screen Shot 2020-04-09 at 12.01.30 PM.png

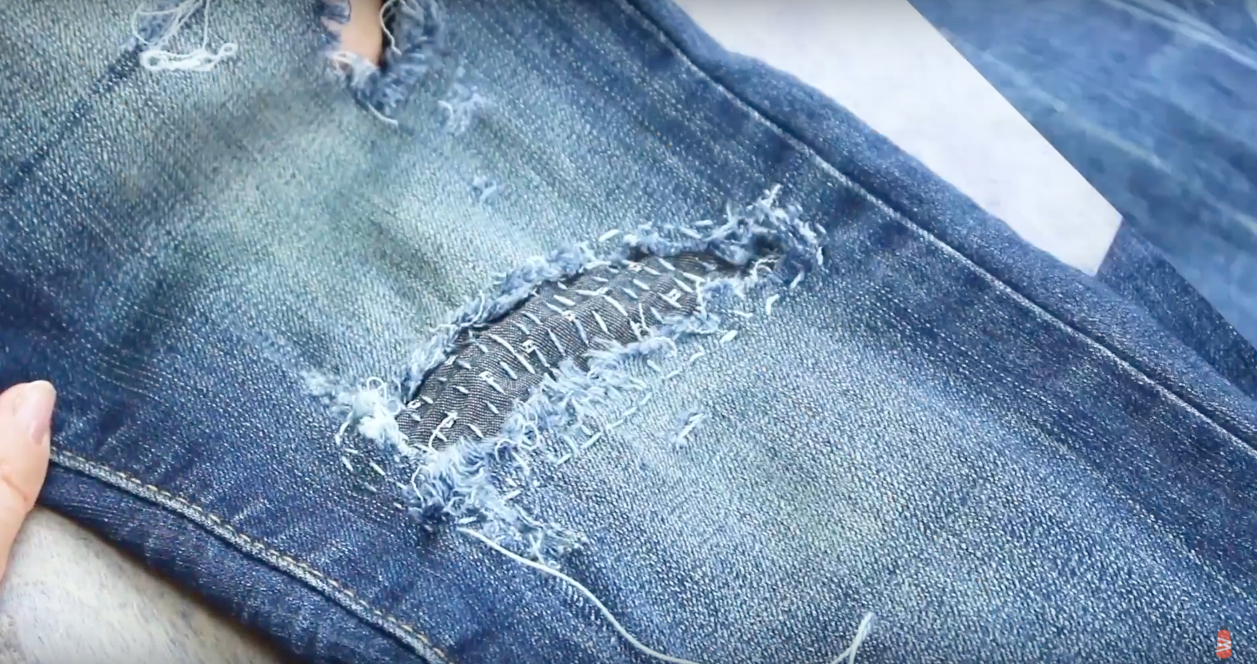
Try to keep your stitches even, but if it is not perfect that is okay because you will still achieve a hand done look. Continue doing these running stitches along the entire length of the hole, row by row. Ensure that you are stitching well past the edges of the scrap and onto the jeans themselves to ensure the scrap will be secured. When you are done it will look something like this:

Screen Shot 2020-04-09 at 12.01.06 PM.png

When you are finished do not forget to tie off the thread on the wrong side of the fabric.

Screen Shot 2020-04-09 at 12.05.03 PM.png

With this incredibly simple technique you can save your favorite pair of jeans. You can experiment with different materials and scrap fabrics for a totally unique look you can make your own!

Screen Shot 2020-04-09 at 12.06.04 PM.png

We hope that you enjoyed making this project! Everything is open to interpretation and we would love to see how yours turned out. Tag us on Facebook @wonderfil, Instagram @wonderfilspecialtythreads, or using the hashtag #wonderfil. Happy crafting!

Simple Ear Guard for Face Masks

Maura Kang

If you’re wearing a face mask using elastic hoops, this simple ear guard will alleviate the pressure they put on your ears by allowing you to hoop them behind your head instead. Two buttons and a few pieces of scrap fabric and batting is all you need to make one! The best part is, they’re incredibly fast to stitch together and can save you a lot of pain, especially if you’re wearing your mask for several hours. Don’t forget to check out our accompanying face mask tutorial to make your own: https://www.wonderfil.ca/blog/easy-diy-face-mask-with-filter-pocket-amp-fitted-nose-crimp/4/8/2020

Materials:

Download the super simple pattern by clicking here.

We used Designer 40wt all-purpose polyester thread to sew our ear guards for added security

We recommend DecoBob 80wt cottonized polyester in pre-wound bobbins as this strong thread offers the most consistent tension for ease of sewing.

2 pieces of fabric cut to the size indicated in the pattern

1 piece of batting cut to the size indicated in the pattern

2 medium sized buttons

Direction:

Before starting, don’t forget to download the pattern linked at the top of our materials list and choose the size you wish to sew. We’re demonstrating using the child size in the pattern. Cut out your 2 pieces of fabric and the batting. These pieces are small enough that we were able to cut them from our scraps!

1.png
2.png

Place your batting piece together with one of the fabric pieces against the wrong side. Pin together and sew all the way around on a ¼” (0.63cm) seam allowance.

3.png
4.png

We added two rows of quilting through the middle to further secure the pieces together. This batting adds an extra layer of cushion against your head so that it sits more comfortably.

5.png

Lay this stitched piece together with the second piece of unstitched fabric facing right sides together. Pin in place and sew on a ¼” (0.63cm) seam allowance, leaving a 2” (5.1cm) gap to turn the piece through. Don’t forget to backstitch at the beginning and end.

6.png

Trim the extra fabric away from the edges, being very careful not to cut into your stitches. Then turn the piece right sides out.

7.png
8.png

We handstitched the remaining gap closed using DecoBob 80wt thread, the same thread we used in the bobbin while sewing in the machine. This small thread will hide better in the fabric so it won’t be seen. We used a smaller short darner size 11 needle to sew it.

9.png
10.png

For the final step, we’ll be sewing the two buttons on by hand. Using Designer 40wt thread now and a sharps needle, simply stitch each button to the end of the rectangle.

11.png
12.png

Your ear guard is now ready to be used! This simple and quick project will help alleviate the pressure face mask elastics put on your ears for a more comfortable wear.

WhatsApp Image 2020-04-13 at 12.33.49 PM.jpeg

Sewing Reverse Appliqué: Free Pillow Pattern!

Maura Kang

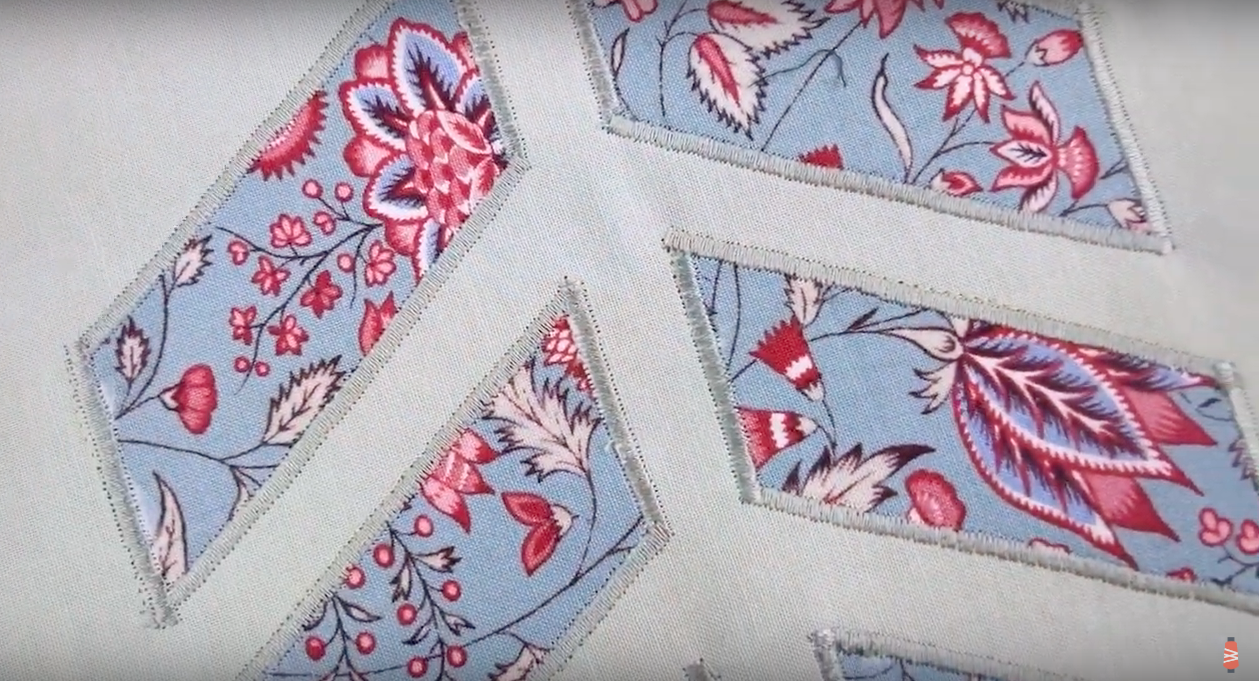
Reverse appliqué is a beautiful way to add interest to any project such as quilts, table runners, bags or decorative pillow cases. This technique is easy to follow along with for beginners and is offers a little more texture than traditional appliqué. We’ll show you how to sew reverse appliqué, then turn it into a fun decorative pillow cover, free pattern included!

Screen Shot 2020-04-02 at 11.32.01 AM.png

Download and print the free pattern by clicking here.

Thread:
•DecoBob and DecoBob Pre-wound bobbins: https://shopwonderfil.com/product-category/decobob
• Splendor: https://shopwonderfil.com/product-category/splendor

Material:
At least two 15” x 15” complimenting fabrics, we chose cottons

Needle:
80/12 Schmetz : https://shopwonderfil.com/product/machine-needles

About the technique: In traditional applique you have a separate cut out piece of fabric and you sew it directly onto another piece. In reverse applique you actually cut out shapes out of the top layer of fabric to reveal the fabric beneath it.

Screen Shot 2020-04-02 at 12.05.39 PM.png

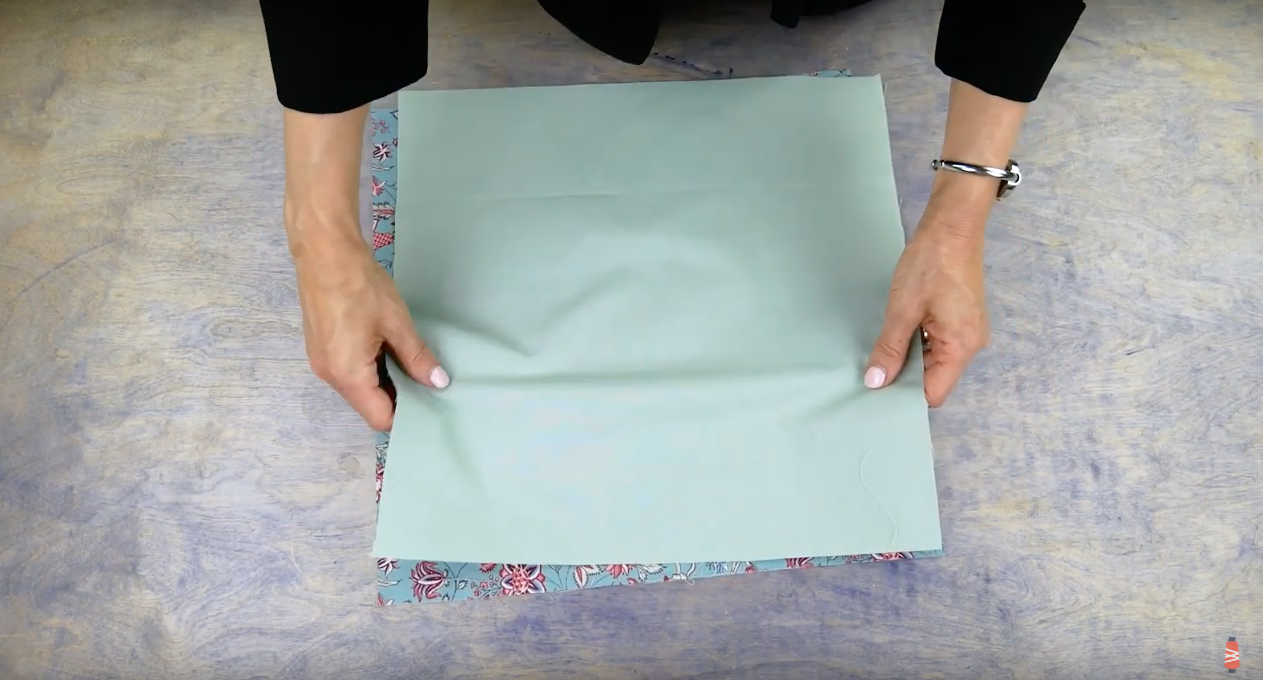
Cut out two pieces of fabric at the same shape and size, we did 15” X 15”. This pillow will be 14” when finished as the size we gave allows for ½” seam allowance around the pattern. Whatever fabric you pick for the bottom will peek through the top fabric - that is why we chose a patterned motif for this. For the pillow back we cut a rectangle that is 15” X 11”.

Screen Shot 2020-04-02 at 12.14.25 PM.png

Next we are going to start by grabbing our matching thread. We chose to use DecoBob since it is so lightweight and thin it makes the seams have very reduced bulk. We are also using and 80/20 needle for our machine to ensure a smooth stitch.

Screen Shot 2020-04-02 at 12.15.04 PM.png
Screen Shot 2020-04-02 at 12.21.06 PM.png

Place the two pieces of fabric right side up with the fabric you want contrasting on the bottom.  Make sure the top fabric is on top of the contrast fabric.

Screen Shot 2020-04-02 at 12.23.45 PM.png

Baste all the way around with a ¼” seam allowance just to hold the pieces together while we cut/appliqué them.

Screen Shot 2020-04-02 at 12.26.43 PM.png

Next you want to grab the pattern that is linked above. We printed this pattern onto cardstock just for a bit more stability.  We used a small knife to cut out the little diagonal windows so we can transfer it onto our fabric. Then trace through the windows you cut out onto your fabric. We used a disappearing marker.

Screen Shot 2020-04-02 at 12.27.57 PM.png
Screen Shot 2020-04-02 at 12.31.48 PM.png
Screen Shot 2020-04-02 at 12.40.58 PM.png

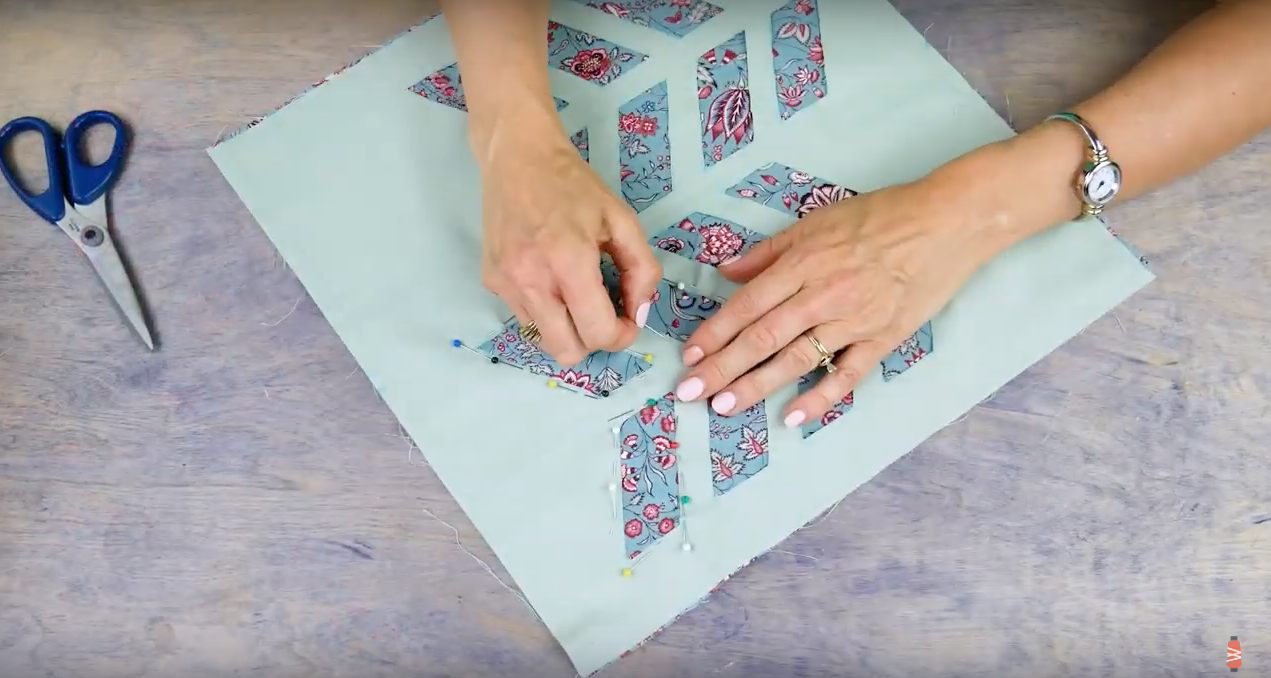
Once you have transferred the pattern, very carefully separate the fabric and cut away your shapes from only the top fabric. When all of the shapes are cut out, then you want to pin the top fabric to the bottom so that it will not move around. Pin around each cut out shape to prevent it from shifting. Or as an alternative option you can glue the top fabric to the bottom around the cut outs with a fabric glue.

Screen Shot 2020-04-02 at 12.42.47 PM.png
Screen Shot 2020-04-02 at 12.45.05 PM.png
Screen Shot 2020-04-02 at 12.46.08 PM.png

Then with your machine, you want to stitch around the cut out shape very close to the edge. This will secure the top to bottom layer so that we can appliqué it nicely.

Screen Shot 2020-04-02 at 12.48.04 PM.png
Screen Shot 2020-04-02 at 12.53.11 PM.png

You could choose to leave the edges raw and continue to make the rest of the pillowcase. We are going to use a decorative stitch on our machine to hide this edge, and it helps to enclose this way if your top fabric frays too. We decided to add a little pop and changed our thread to Splendor, which is a beautiful shiny rayon thread.  We kept the DecoBob in the bobbin.

Screen Shot 2020-04-02 at 1.03.46 PM.png

We recommend adding a stabilizer before finishing off the applique on the edges, as it will add a little bit more structure and strength to the area. We added tear away stabilizer to the wrong side of this piece and ironed it on.

We did a satin stitch around each edge (zig zag). Make sure that when you are sewing this, that the stitch will enclose the raw edge.

When finished the shapes should look something like this:

Screen Shot 2020-04-02 at 1.05.36 PM.png

Once you are happy with this stitching then you can tear away the excess stabilizer on the wrong side.

Screen Shot 2020-04-02 at 1.07.29 PM.png
Screen Shot 2020-04-02 at 1.07.37 PM.png

Now we are going to make the pillow back. Along one 15” edge of a back piece press a 1” hem to the wrong side of the fabric.

Screen Shot 2020-04-02 at 1.10.54 PM.png

Once you have ironed this 1” hem then fold it over again to enclose the raw edge of the fabric.

Screen Shot 2020-04-02 at 1.12.13 PM.png

Stitch along the pressed edge to create a 1” double hem. Sew close to the edge so that the hem lays flat and will not pop up. Repeat this step for the other back piece so that there is one finished hem edge on both.

Screen Shot 2020-04-02 at 1.12.59 PM.png
Screen Shot 2020-04-02 at 1.13.50 PM.png

Face the hemmed edges together and lay one back piece on top of the other. On one piece we used pins to mark 3” from the hemmed side. When placing one on top of the other it should line up with this three-inch mark- giving a 3” overlap. Then once they are placed with the 3” overlap, pin together so they stay in place.

Screen Shot 2020-04-02 at 1.18.31 PM.png
Screen Shot 2020-04-02 at 1.19.12 PM.png

Baste the raw edges where they overlap to help hold it in place. Baste at ¼” so that it will be hidden in the seam. Then place the right side of the back of the pillowcase ad the right side of the front pillowcase together.

Screen Shot 2020-04-02 at 1.30.02 PM.png
Screen Shot 2020-04-02 at 1.32.03 PM.png

Then you can pin around the outside, and stitch around the entire square. Use a ½” seam allowance.

Screen Shot 2020-04-02 at 1.33.52 PM.png

Once you have sewn the whole square then cut straight across the corners of the fabric - making sure not to catch any of your stitch. This will reduce bulk and let the corners come out crisper. Turn your pillowcase to the right side through the double hemmed opening made on the back.

Screen Shot 2020-04-02 at 1.34.20 PM.png
Screen Shot 2020-04-02 at 1.37.00 PM.png

Once pulled through then make sure the corners are poked out well. You can use your fingers, or something pointy but not too sharp such as a chopstick. Then you can lightly iron around the edges- this will make the seam lay better when the pillow form is inserted.

Screen Shot 2020-04-02 at 1.37.54 PM.png

Insert the pillow form through the back opening to finish!

Screen Shot 2020-04-02 at 1.40.21 PM.png

There are so many ways to use reverse appliqué. We hope that you enjoyed making this project! Whether you decided to make this pillow, or use the technique in another way we would love to see. Tag us on Facebook @wonderfil, Instagram @wonderfilspecialtythreads, or using the hashtag #wonderfil. Happy crafting!

DIY Face Mask By Hand With Filter Pocket & Fitted Nose Crimp

Maura Kang

WhatsApp Image 2020-04-09 at 11.48.47 AM.jpeg

Don’t have a sewing machine at home? No problem, you can still make your own face masks by sewing them by hand using our pattern that includes an optional nose crimp (for a better fit to your face) and filter pocket. The best part is, it can all be completed with items you likely have around your house already! If you’d like to check out our alternative tutorial on sewing this face mask using a sewing machine, click here.

Download the written instructions and pattern PDF here: https://bit.ly/2UTT1fN 

Materials needed:

• Top fabric in 100% cotton -
For Adult: 9” x 8” (22.9cm x 20.3cm)
For Kids: 8.5” x 8” (21.6cm x 20.3cm)
• Lining fabric in 100% cotton -
For Adult: 7” x 7.5” (17.8cm x 19cm)
For Kids: 6.5” x 7.5” (16.5cm x 19cm)
• (option 1) Elastic cord - Note that we found the round elastic more comfortable to wear over a longer period of time, but a flat elastic cord will still function if that’s what you have.
• (option 2) If you do not have any elastic cord at home, you can sew your own ties by cutting 2 of 12” x 1” strips of fabric, folding it in half twice lengthwise, and sewing down the center to secure them.
• Sewing thread - We used Designer™ 40wt polyester for the top thread as it is strong and flexible, and DecoBob™ 80wt cottonized polyester in the bobbin. Cotton sewing thread will also work just fine.
• (optional) Aluminum can or paper clip for the nose crimp

* Note that 100% cotton is recommended to sew your masks from as it offers both breathability while still doing an okay job filtering particles.

Filter:
• Cut to 6.5“ x 2.5” (16.5cm x 6.4cm). If you have access to a non-woven polypropylene fabric (used in the manufacturing of face masks), this would make the best filter to place in this pattern’s filter pocket and would be disposed of after use. However if you do not, you can use another piece of 100% cotton fabric as we did in this video. You can either dispose of it after use or wash it as described below.

Washing your face mask:
• It is recommended that your reusable face mask is washed in your home washing machine with the water settings on hot using regular washing detergent. It should then be completely dried in the dryer on high heat. Wash your face mask after each use.

WhatsApp Image 2020-04-09 at 11.48.47 AM (1).jpeg

Direction:

We’ve got two sizes for both adults and kids so you can make masks to help keep your whole family safe! Begin by cutting out your front and lining fabric pieces according to the size you need from the PDF pattern downloadable at the top. Demonstrated below is the adult size.

1.png
2.png

Press the hem up on both the main and lining pieces by ½” (1.3cm) along one of the long sides.

3.png
4.png

Then stitch across the hems on the main and lining pieces using a backstitch to secure them.

5.png

Place your lining and main fabrics right sides together, centered on the long edge opposite the hems. Pin together, then backstitch along this edge to secure them.

7.png
8.png

Flip the fabric pieces over so they are now facing the wrong sides together and press the seam so it lays flat.

9.png
10.png

If you wish you add a nose crimp for a better fit, you can cut a 4” x 0.5” (10cm x 1.3cm) strip out of an aluminum can, or use a cut piece of paper clip of pipe cleaner. Watch our video located above beginning at 1:50 to see how to safely cut open an aluminum can.

11.png

Place the nose crimp between the main and lining fabric, centered along the connecting seam. Then fold the fabric back over and pin around the strip to create a small pocket for it. You can use the placement of these pins to act as a guide for where you should backstitch around the nose crimp strip.

12.png
13.png
14.png

Once your nose crimp is secured in place, fold ½” (1.3cm) from the bottom of the main fabric and press it in place.

15.png

Flip your mask over to the right side and create 3 pleats by folding down from the top. Press the pleats into place.

16.png
17.png

Pin your pleats into place along the backside. You can now begin backstitching it all down on each end.

18.png
19.png

The bottom of your mask will have an opening for the filter to be placed!

20.png

Fold one of the ends over by ½” (1.3cm) and press. Then fold it over one more time and press it again to hide the raw edges. Pin it to hold it in place and then do the same on the other side.

21.png
22.png

Using a whip stitch, sew the inside edge to the lining to create a pocket for the elastic/strap to run through. Be careful not to sew through to the other side of the fabric.

23.png

Finally, take your elastics or sewn straps and attach a safety pin to the end to help feed it through the pockets you sewed on each end. If you used elastics, you can tie them in a knot and hide the knot inside the pocket. Sewn straps can be tied behind your head as you don the mask.

24.png

Simply place a filter in the pocket and your face mask is ready to be worn! Don’t forget to press the nose crimp around the contours of your nose for a better, tighter fit.

WhatsApp Image 2020-04-09 at 11.48.47 AM (1).jpeg

How to Darn a Sock by Hand

Maura Kang

Socks are always one of the fastest pieces of clothing to wear out, so why not try to preserve them (and its mate) instead of just tossing them away when a hole shows up? Darning is a super simple technique everyone can do, and you can use this technique for any piece of clothing, accessory, blanket, or item that has a hole in the fabric. We’ll show you two ways of darning a sock, whether you want to make it look good as new or embellish it with a statement.

Screen Shot 2020-04-07 at 11.00.09 AM.png
Screen Shot 2020-04-07 at 11.00.35 AM.png

First thing you will want to do is take a close look at the thickness of your sock. In order to mend the hole you need a thread that is a similar weight to the sock. 

For our thicker sock we are using a 3wt thread called Eleganza, which you can purchase here: https://www.suespargo.com/store.php?cat=90. We love this thread line because since it has been double gassed it results in very low lint- making it very smooth and easy to work with. It is also very strong and therefore great for mending.

3wt Eleganza

3wt Eleganza

For the thinner sock we are using the same Eleganza but in a thinner 8wt instead. You can purchase following the same link listed above.

8wt Eleganza

8wt Eleganza

We are using a darning mushroom, this will give us a nice large curved surface that makes the perfect platform to do the stitches on. We got ours from Clover, though there are many places that you can get one. As an alternative you could use anything small and curved like a snow globe, mug, jar, etc.

Screen Shot 2020-04-07 at 11.24.10 AM.png
Screen Shot 2020-04-07 at 11.24.32 AM.png

We are going to be using a needle that comes with this kit to darn our socks. There are three sizes of needle included in this- use the appropriate size based on the thread for mending the sock.

Screen Shot 2020-04-07 at 11.37.15 AM.png

You want to place your sock onto the darning tool. Make sure the right side of the sock is facing out so you can see it.

Screen Shot 2020-04-07 at 11.35.51 AM.png

You want to position so you have a nice placement of your hole over the darning tool. Then secure with the band included, or use an elastic band/hair tie.

Screen Shot 2020-04-07 at 11.36.09 AM.png

For our hole we are cutting about 20” of the Eleganza 3 wt thread. This measurement will of course differ depending on the size of your hole.

Screen Shot 2020-04-07 at 11.42.15 AM.png
Screen Shot 2020-04-07 at 11.42.52 AM.png

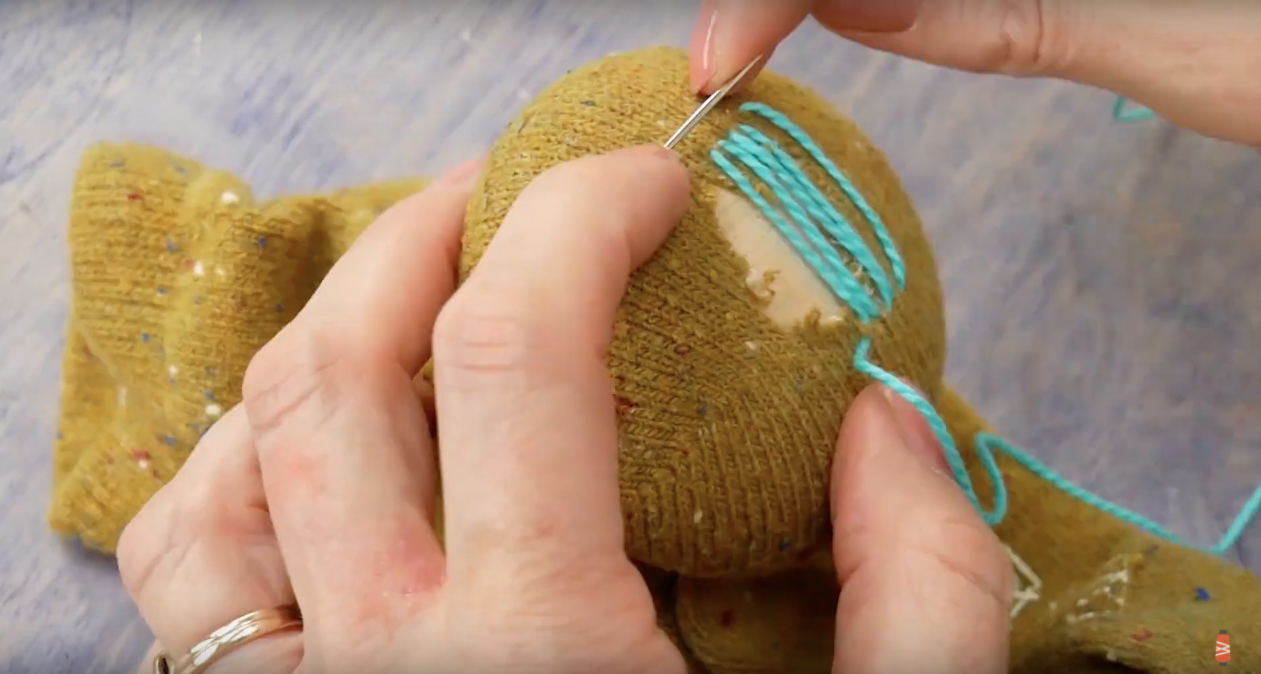
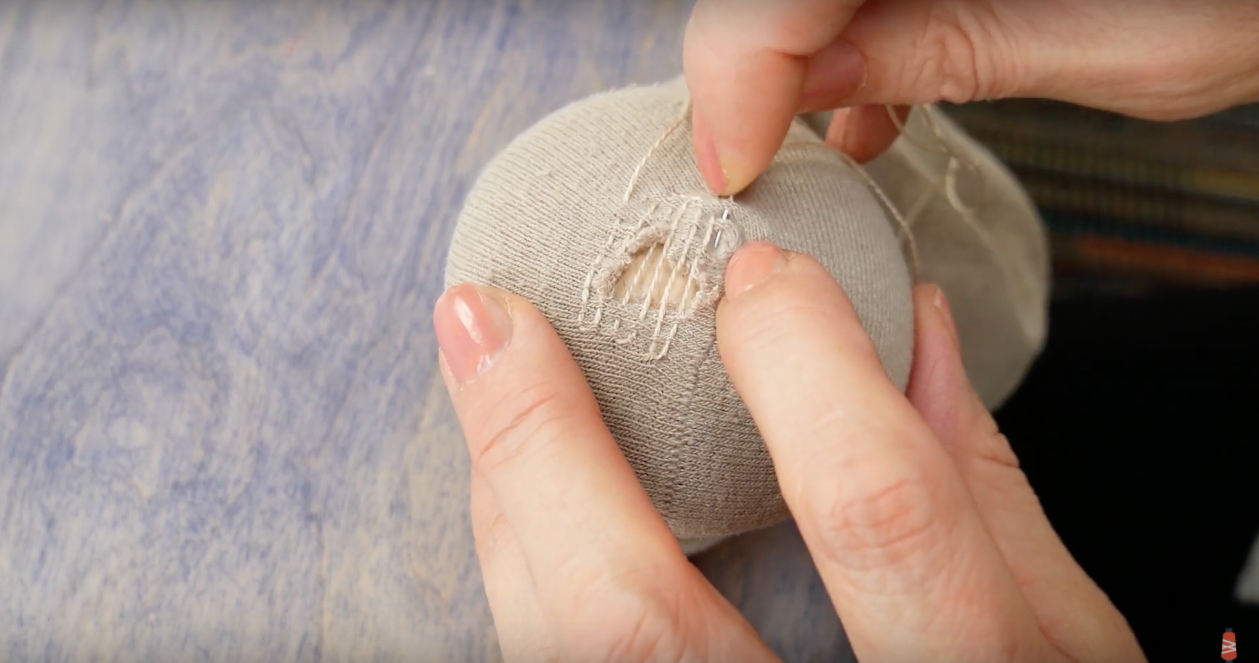
Thread your needle and then we are ready to start sewing! Start on the top right of your hole. Pull the thread through with a knot on the wrong side. Then pull your thread through down to the opposite side on the bottom.

Screen Shot 2020-04-07 at 11.45.26 AM.png
Screen Shot 2020-04-07 at 11.46.44 AM.png

Repeat, working from right to left. Once you have covered the hole, extend a little past into the fabric- just to secure the thread. You can remove from your needle, but leave the tail long for now as we will secure and tie it off at the end.

Screen Shot 2020-04-07 at 11.50.52 AM.png
Screen Shot 2020-04-07 at 11.53.32 AM.png

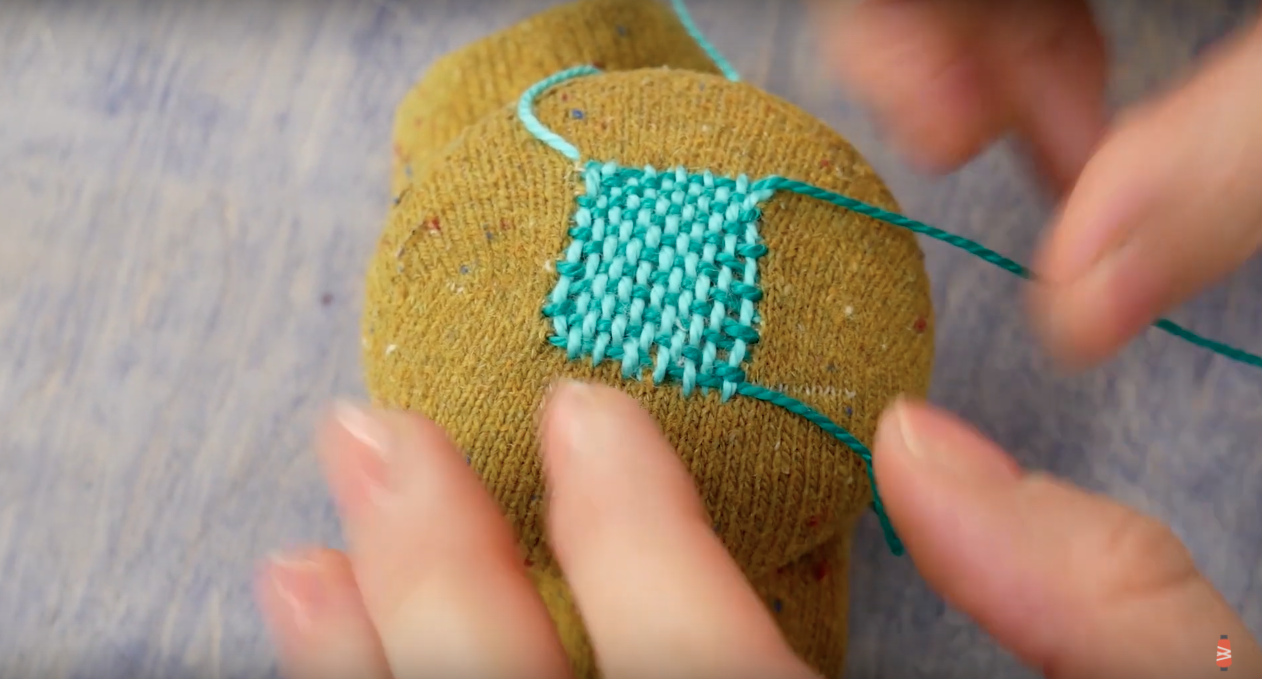
Next to make this mending stronger we are creating a weaved stitch in the opposite direction. You can use the same color of thread, but to make it look a little funkier we are doing an accenting color. Working perpendicular, with your needle weave above and below the previously created stitches. Leave a long tail where you started your stitch, and once you reach the other side take a small pick of the sock before starting the next line of the weave.

Screen Shot 2020-04-07 at 11.53.15 AM.png

When you have your stitch in the sock fabric at the end of the row, then you can continue back the way your started going under and over the opposite threads you did in the first row. Make sure you are going over and under the correct thread for your row, or else the weave pattern will not be created.

Continue until you have filled the whole area with the weave. You should have a tight and strong area now. Leave all of the thread ends long.

Screen Shot 2020-04-07 at 11.56.03 AM.png
Screen Shot 2020-04-07 at 11.58.42 AM.png

You can pull the sock off the darning tool and cut the thread tails to about 2 or 3 inches. Then pull the threads through to the wrong side of the sock using the needle.

Take the extra thread strand and stitch a few small stitches on the wrong side before tying a knot.  Repeat for all thread tails.

Screen Shot 2020-04-07 at 11.59.58 AM.png
Screen Shot 2020-04-07 at 12.00.56 PM.png

Once finished then iron the patch to smooth it out.

Now you have a super cool patch that will add a little pop of colour!

Screen Shot 2020-04-07 at 12.03.19 PM.png

If you are looking to integrate the look of your darning so it blends in with the rest of the sock, you may want to choose a smaller thread, closer to the strands in your sock, with a matching thread colour. Because the thread is taking up less space, it may take a little longer to complete your darning.  Repeat the same steps as listed above.

Screen Shot 2020-04-07 at 12.09.45 PM.png
Screen Shot 2020-04-07 at 12.20.22 PM.png
Screen Shot 2020-04-07 at 12.19.46 PM.png

We hope that this fun tutorial may have helped you salvage a few pairs of socks. If you decided to try something funkier or decided to do a subtler mend, we would love to see it. Tag us on Facebook @wonderfil, Instagram @wonderfilspecialtythreads, or using the hashtag #wonderfil. Happy crafting!

Easy DIY Face Mask With Filter Pocket & Fitted Nose Crimp

Maura Kang

To keep both you and your loved ones safe, we've created a face mask pattern and video tutorial with an optional nose crimp and filter pocket. And it can all be completed with items you probably have around the house already! Check out our easy DIY face mask tutorial from the link in our bio. Stay safe, everyone!

Download the written instructions and pattern here: https://bit.ly/2UUTIWl

Materials needed:

• 9” x 8” (22.9cm x 20.3cm) top fabric in 100% cotton
• 7” x 7.5” (17.8cm x 19cm) lining fabric in 100% cotton
• (option 1) Elastic cord - Note that we found the round elastic more comfortable to wear over a longer period of time, but a flat elastic cord will still function if that’s what you have.
• (option 2) If you do not have any elastic cord at home, you can sew your own ties by cutting 2 of 12” x 1” strips of fabric, folding it in half twice lengthwise, and sewing down the center to secure them.
• Sewing thread - We used Designer™ 40wt polyester for the top thread as it is strong and flexible, and DecoBob™ 80wt cottonized polyester in the bobbin. Cotton sewing thread will also work just fine.
• (optional) Aluminum can or paper clip for the nose crimp

* Note that 100% cotton is recommended to sew your masks from as it offers both breathability while still doing an okay job filtering particles.


Filter:

• Cut to 6.5“ x 2.5” (16.5cm x 6.4cm). If you have access to a non-woven polypropylene fabric (used in the manufacturing of face masks), this would make the best filter to place in this pattern’s filter pocket and would be disposed of after use. However if you do not, you can use another piece of 100% cotton fabric as we did in this video. You can either dispose of it after use or wash it as described below.


Washing your face mask:

• It is recommended that your reusable face mask is washed in your home washing machine with the water settings on hot using regular washing detergent. It should then be completely dried in the dryer on high heat. Wash your face mask after each use.

Direction:

Cut out the main and lining fabric as per the sizes listed. On the long side of each piece of fabric, press the hem up by ½” (or 1.3cm).

2.png

Using a ¼” (or 0.65cm) seam allowance, sew across the hems on both pieces of fabric.

3.png

The right side of your fabric will look like this:

4.png

Place the lining fabric on the top fabric right sides together with the lining piece centered in the middle of the long side and the raw edges together. Pin them in place against the raw edge.

5.png

Sew along the raw edge with a ¼” (0.65cm) seam allowance.

6.png

Flip the pieces around so they’re now facing the wrong sides together and give it a press so it lays flat.

7.png

Next we’ll be adding a nose crimp so that the face mask fits around the contours of the nose better. This will result in a snugger and more comfortable fit. We will be making our nose crimp from an aluminum can, however you can also use a piece of cut paper clip as well. If you would prefer not to include a nose crimp in your mask, you can skip this step.

8.png
9.png

To safely cut open an aluminum can, punch a hole using an exacto knife on each end of the can. Take a pair of sharp and sturdy scissors (not your fabric scissors!) and cut away the top and bottom of the can.

10.png
11.png

Cut straight up through the center to open the can up and trim away the sharp, jagged edges on each end. You’ll now have a flat piece of aluminum to cut your nose crimp from. Using an exacto knife, cut a ½” (1.3cm) strip from aluminum and trim it down to a length of 4” (10cm). Because the corners will still be sharp, we recommend buffing them out with a sheet of extra fine sandpaper so that it doesn’t tear into the fabric. A nail file will also work in a pinch.

12.png

Place the aluminum strip between the top and lining fabric, snug against the seam where they are sewn together. Keep it centered and use pins on either side and under it to hold it in place, while also giving yourself a visual on where you should sew to create a pocket around it.

13.png
14.png

Next, fold ½” (1.3cm) from the fabric on the opposite edge from the nose strip pocket and press it into place.

15.png

Flip the fabric over to the right side and fold 3 pleats all the way down the fabric. Press them into place.

16.png
17.png

Pin the pleats into place on the wrong side and sew on a ¼” (0.64cm) seam allowance from the edge of the lining fabric.

18.png
19.png

The opening at the bottom can fit a 6.5“ x 2.5” (16.5cm x 6.4cm) size filter sheet!

20.png

To create a pocket for the ear elastics (or straps if you’re sewing your own), fold the raw edges on each side over by ½” (1.3cm), then again a second time, pressing after each fold.

21.png
22.png

Sew as close as you can to the inner edge to create a hole for your elastics/straps.

23.png
24.png

Your face mask is almost complete! It will look much like this:

25.png

The last step is to put the elastic or straps through the holes. For elastics, cut two 12” (30.5cm) long lengths. If you are sewing your own straps, cut two 12” x 1” (30.5cm x 2.5cm) pieces of fabric. Fold them in half lengthwise twice and sew once down the center to secure them.

Elastics

Elastics

Fabric Straps

Fabric Straps

Using a safety pin pinned to the elastic/strap, run it through the pocket to the other side. If you are using an elastic, knot both ends and hide the knot inside the pocket. If you are using straps, they can be secured behind your head when you are ready to wear it.

28.png

To fit the mask to your face, put it on and press around the aluminum strip to mould it around the shape of your nose. Please follow the washing instructions listed at the top to ensure your reusable face mask stays sanitary!

29.png

Catnip Carrot Cat Toy

Maura Kang

1.jpg

Have a cat at home that needs some lovin'? Entertain them (and you!) with a homemade catnip-stuffed carrot toy. This simple pattern can be whipped up in under an hour but will provide several hours of fun for your fluffy feline. This simple and quick project can be done with just a few small pieces of wool or felt fabric and some basic hand stitches to make it look pretty.

Materials:

-       Download and print the free pattern here.

-       Loose catnip to stuff the toy with.

-       A sheet of orange wool or felt material, approx. 9” x 7” (we used color LN49 Kumquat from the 1/32 Merino wool size packs in Orange).

-       One or two colours of green wool or felt material, approx. 7” x 4.5” (we used colors LN14 Periodot and LN16 Pine Needle from the 1/64 Merino wool size packs in Green).

-       A top thread for sewing in the machine (we used 50wt Egyptian cotton Konfetti thread in color KT404).

-       A bobbin thread (we used 80wt DecoBob cottonized poly in color DB410).

-       #8 perle cotton embroidery thread (we used Eleganza perle cotton in colors EZ118 New Spring and EZM1060 Volcano)

(optional) A wool/acrylic thread to sew the top shut after stuffing (we used Ellana wool/acrylic in color EN49 Kumquat to pair with the orange wool precisely).

2.jpg

Begin by cutting out and tracing the free pattern (downloadable above) and cutting out your carrot pieces.

3.jpg

Use your #8 perle cotton to add some embellishments to your pieces. While you can embellish your them however you like, we used a simple chain stitch to add some accents to each wool piece.

4.jpg
5.jpg

Load your machine with a regular sewing thread in the top and bobbin. Lay your two orange carrot pieces right sides together and sew using a ¼” (quarter inch) seam allowance to sew the sides and tip together. Begin slightly below the corner on one side and end at the same place on the opposite so that you leave an opening at the top. Don’t forget to backstitch on both ends.

6.jpg

Trim and turn your piece inside out so the right sides are facing out again. Now you can stuff the pocket with catnip! Don’t overstuff the toy and ensure the top flap will lay flat so you can still sew it shut.

7.jpg

Arrange the two leaves in the top and tuck in the loose edges. Pin or clip it all together and hand sew the opening closed using the wool/acrylic thread. This thread will blend in significantly better into the wool fibres, especially if you use the Merino wool and Ellana wool/acrylic thread as they are dyed to the exact same color.

8.jpg

That’s actually all there is to it! This adorable little toy will keep your cat busy for hours. If you make it yourself, don’t forget to tag us on social media using #wonderfil to share it with us!